Color Mixing
Before I launch into my latest makeover, at the end of this post, I’ll share some Top Color Mixing tips for creating custom colours with Miss Mustard Seed’s Milk Paint, including a pinnable graphic for you to pin, share or save.
Re-cycled Finds
Our local Recycle Market is a place I’ll often find furniture to upcycle, and that’s where I found these two rustic country looking “love-birds”. For other places to find furniture to up-cycle, check out my post: Top 10 Places to Find Furniture to Restore.

Apart from a little hassle unscrewing the handles (these screws were so old and 2 had busted in half – see pic below), these drawers were pretty easy to prep – just a quick rough sanding with my Sandi Hands sanding glove, and they were ready to paint.
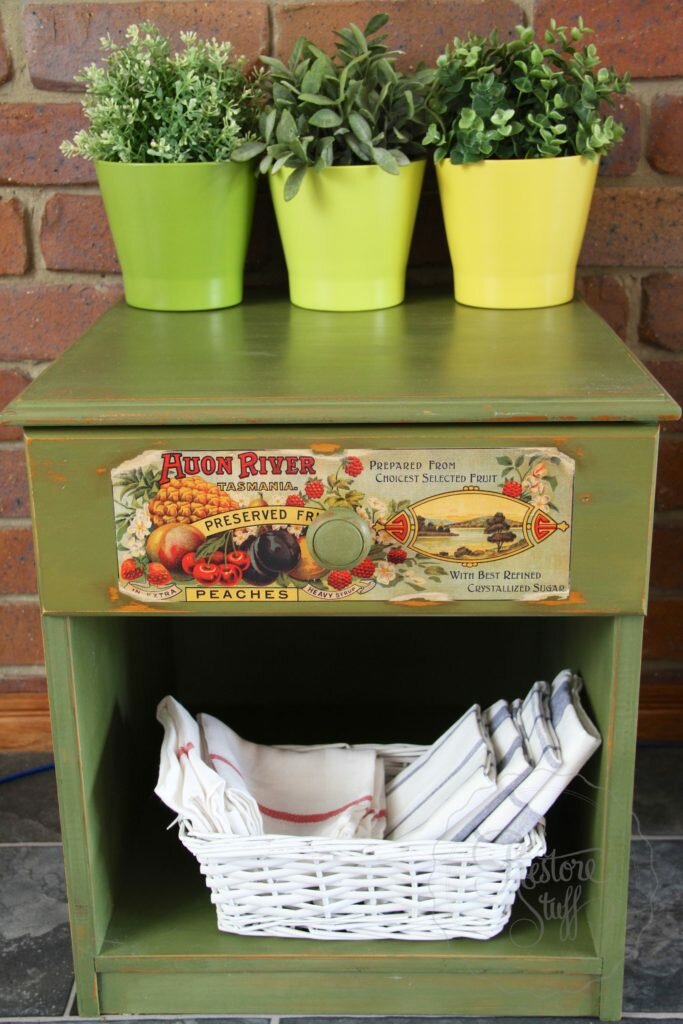
 I mixed a custom colour for these beauties, using Miss Mustard Seed’s Milk Paint.

+

I mixed equal parts of the European colour, Bergere, with the new Farmhouse White (above), to create this pretty French Blue. For more of my Tips on Colour Mixing, scroll to the end of this post.


I find the blue & green colours difficult to photograph in certain lights, so you’ll notice slight differences in my images provided.


Tips for Custom Color mixing:
- Experiment – choose colours that you know will work together, but don’t be afraid to step out of the box and try some new combinations.
- ALWAYS write down your “recipe” – this makes sense, but is often forgotten. Then when we find the perfect colour, we ask “how did I get that?”
- Start with equal parts of two colours – If you are unsure where to begin, this is a great starting point. Then you can add more of one colour or the other as you mix and blend to get something you are happy with.
- Remember that the colour will dry differently to what it appears when it is wet. Paint out your colour on a sample board or cardboard to get a better idea.
- Then you will probably want to test out finishes like wax over the top of your painted sample, as this will also change and deepen the colour of your paint. (On this point, the surface that you will eventually paint on, will also affect the colour slightly. You can see what I mean by watching the first part of my tutorial video on ““)
- If you are using Milk Paint powders, make sure you blend the powders well together, then add your water. This isn’t essential, but may help in getting more of a consistent finish. Make sure you are always adding equal parts water to the amount of paint powder you are mixing.
Custom Colour’s you might like to try:
- Miss Mustard Seed’s Milk Paint tutorial on Mixing Colours. Some great colour recipes here.
- Vintage Chalkboard Green – by Alison from The Golden Sycamore
- Robyn’s Egg Blue – by Abbe from All Dolled Up
- Creamsicle Orange – by Abbe from All Dolled Up
- The Purple Painted Lady has created a fun custom colour mixer that you can enter your colours into online and it will show you a virtual colour that will be made from your MMS colours. Remember that it won’t be exact as you cannot compare colours on a computer screen with the real thing, but it’s a great start to seeing what may work for you.
Here’s a Pinnable graphic for you to save on your :

Hover over the Pinterest Button to save this to your pinterest board.
I’d love to hear what colour recipes you’ve tried. Let me know your combo’s in the comments below.
Also, if you have any extra helpful tips on mixing colours, please share!
Happy painting!
Sharon.
We are authorised retailers for Fusion Mineral Paint and Miss Mustard Seed's Milk Paint in Australia. This blog post may contain affiliate links.

10 Comments
Rachel
March 31, 2016 at 7:02 pmI love how you take other people’s off casts and shape them into fantastic vintage furniture. It’s so inspiring Sharon. I’ve been thinking for a while that my daughter and I would love a project like this!
IRestoreStuff
April 1, 2016 at 8:39 amThanks Rachel. I find it pretty satisfying and once you’ve tried your first project, you may catch “the bug” and find it quite addictive, so look out. 😉
Joleene Moody
April 5, 2016 at 10:39 amI love this stuff. LOVE it. I found an old colonial desk at an antique shop and distressed dark pink in some areas first, and then antique white overall. When I sanded it, only some areas with the pink showed through. Looks SO cool. Every time someone is my office, they say, “Wow! That’s cool!”
That’s all I can really do…is distress with white. (giggle) Really like this site!!
IRestoreStuff
April 5, 2016 at 11:35 amOh Joleene, your comment made me giggle! Because I can so relate to your excitement at finding old stuff and making it look awesome again. So glad you are enjoying my site. Don’t forget to subscribe if you haven’t already. 😉
Angela
April 6, 2016 at 5:16 amLove what you’ve done with these tables! And thanks for sharing those great tips. I would love to try a project like this one day.
IRestoreStuff
April 6, 2016 at 6:55 amThanks Angela!
Susie
April 16, 2016 at 11:19 pmThe custom color is beautiful. And your tips are genius. I will try and stress for folks to visit to see both. Thanks so much for linking to Friday’s Furniture Fix. Sharing on IG and FB today. XO Susie from The Chelsea Project
IRestoreStuff
April 17, 2016 at 4:16 pmThanks so much Susie!
Melanie
April 19, 2016 at 12:09 amLove these Sharon! I love mixing and playing with colors, and your tips are spot on. I pinned your graphic to several of my Pinterest boards! I’ve never heard of a sanding glove either . . . May have to go check that out! Thanks so much for joining us at FFF 🙂
IRestoreStuff
April 19, 2016 at 9:22 amThanks Melanie! Yes, the sanding gloves are great! you must check them out.