The Dim, Dark, Brick Wall Makeover
I’ve been annoyed by the dim darkness of our brick wall entry way for years now. I mean, seriously this photo below makes it look a lot lighter than it really is in the middle of a sunny day! I have to turn the light on in this little space every time someone comes to the front door!
I’ve been painting so much furniture this year, but none of it has been for our home. It’s all to sell or restore for others. But I began to look at my stockpile of saleable items and thought it was high time we made a dent in some of the much needed updates around our own home.
The entry of the house seemed a good place to start!
This is a view of the front door taken from the brick wall side of the entry way.
See that hall table against the wall?
I’m thinking it is beckoning my paint brush too! (oh, I forgot to remove my iphone tripod off the table for this pic, as well as the mixed up Milk Paint ready to go!)
 My son snapped this photo of me vacuuming the brick wall ready to paint it. That is all I did to prep this wall!
If I really wanted to be picky, I could probably have scrubbed and washed and wiped it down … yeah, nah! (as us Aussie’s would say)

All ready for painting!
Maybe I should paint the front door soon too, what do you think?
If you follow my Facebook page, you may have seen the progress video I posted (see below) showing you how I tackled this brick wall.
I love Miss Mustard Seed’s Milk Paint for it’s authentic rustic aged look and that was the exact feel I wanted for our brick wall. A rustic French Country weathered wall!
The bricks were quite porous and really soaked up that Grainsack, making the off white look darker than I was wanting for the finished look. So I went over with a second coat of paint in the MMSMP colour Farmhouse White.
You can see here the difference in the coats where I’ve painted the Farmhouse White:
I love the white look, having left some of the Grainsack show through slightly in some parts, and the mortar left alone too. And remember that hall table? It’s roughly sanded back here and ready for a Miss Mustard Seed’s Milk Paint makeover in Farmhouse White too.
 I used two coats of Farmhouse White without any bonding agent, which resulted in a lovely amount of chippy goodness.


 I’m so happy with the result of that wall. It really lightens up the whole entry way.
 I feel like I’m still in the learning stages of staging. Ugh, I actually feel a bit hopeless about staging to be honest. After taking the above picture and starting to edit the photos, I felt the hall table was too cluttered, so I went back for a re-take and came up with a simpler look below … I’d love to hear your thoughts on staging.

Simpler staging – yes or no?
Leave a comment if you have any helpful advise for me in the “case of the cluttered hall table”! Haha. Meanwhile on the other side of the entry, I dragged out an old wash stand I had in another area of the house, to see how that worked in this space. Not sure I’m convinced it needs to be here, but it will do for now.

A closer look at the rustic milk painted brick:


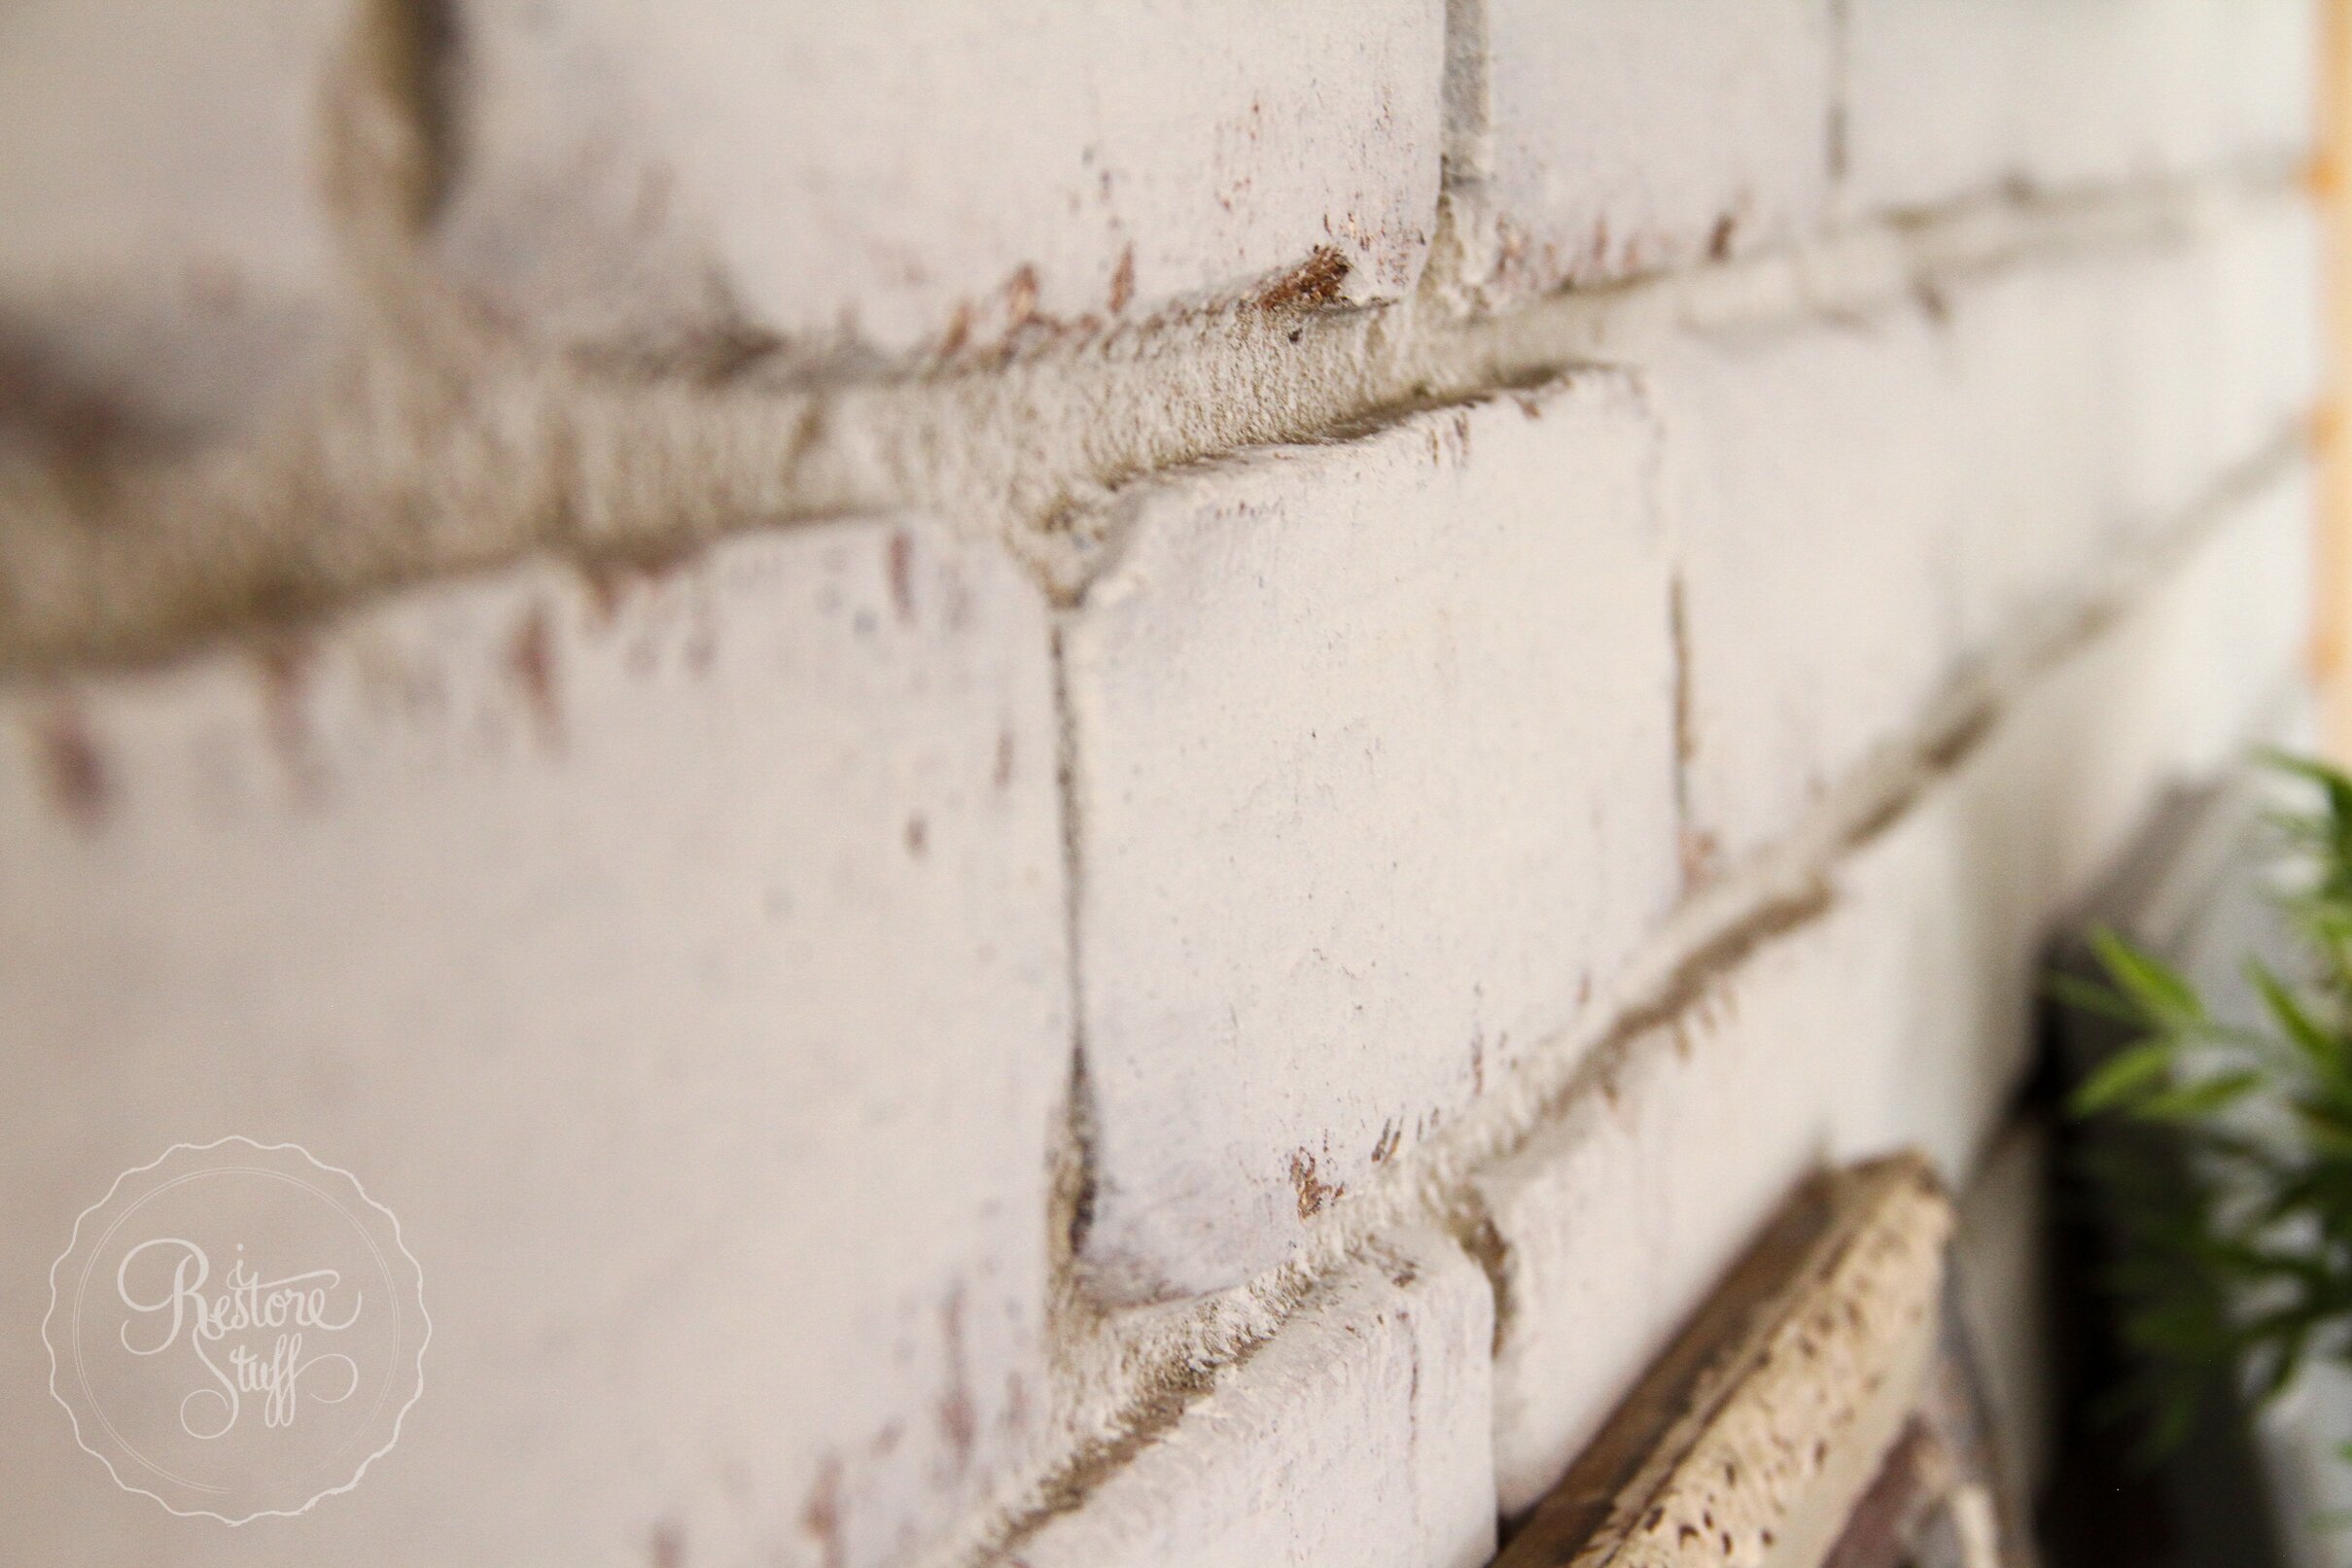 Here you can see more of the depth of colour with some of the Grainsack peeking through the Farmhouse White:

This was such an easy project to complete. If you need further instruction on using Miss Mustard Seed’s Milk Paint, you can view the tutorials I have here on my website under the Tutorial tab.
Before & After:


Questions about Painting Brick Walls with Milk Paint?
I had a LOT of comments and favourable feedback on the short video I posted on Facebook (see video above). Here are a few that I’ll answer here, in case you have similar questions.
Q: Do you think you could do this same process on exterior brick?
Answer: Yes, you can use on external bricks, especially since the bricks are so porous and the paint soaks right in. If in doubt about your particular bricks/surface, I’d test it on some spare bricks and put them out in the elements for a while and see how they hold up. You can also seal it using Miss Mustard Seed’s Tough Coat Sealer for added protection.
Q: Did you add any bonding agent?
Answer: No, I didn’t need to add Miss Mustard Seed’s Bonding Agent because the brick surface was quite porous and therefore the paint soaks in. Bonding Agent is usually only necessary on non-porous surfaces to assist with the paint adhesion to slick surfaces.
Q: Will you seal the painted surface?
Answer: No, I don’t intend to seal the milk paint on this surface. It is a porous surface and the MMS Milk Paint has adhered really well, and I know there will not be any hard wearing on the surface – it’s a wall and no one is going to be using it. I thought I’d just leave it natural and rustic – no need for Furniture Wax or Tough Coat Sealer.
Q: What if you wanted the bricks to look even more rustic and weathered than this?
Answer: I had thought about this, and may even do this one day. For a more distressed, rustic look, simply sand back as much as you like on any areas of brick, removing the paint until you are happy with the look you are after.
If you have any other questions, please feel free to comment below and I’d be happy to answer them.
I hope this post has encouraged you to think outside the box when using Miss Mustard Seed’s Milk Paint as there are so many different applications for this all natural, eco friendly paint.
Check out another post on Painting with Miss Mustard Seed’s Milk Paint on Walls: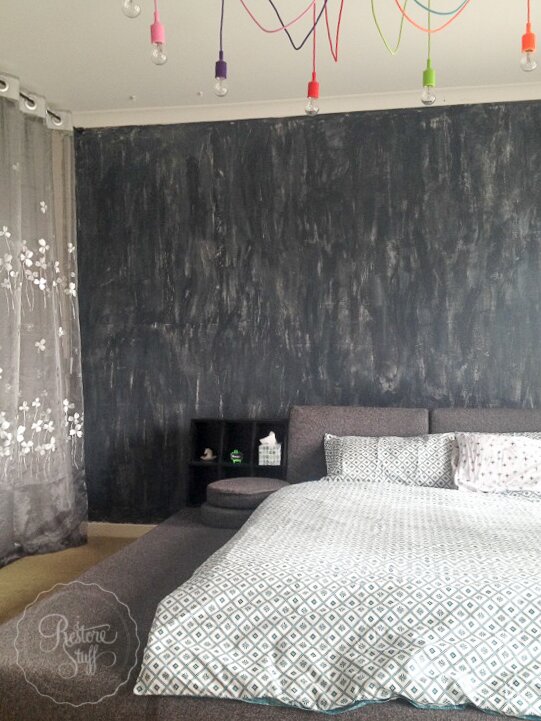


We are authorised retailers for Fusion Mineral Paint and Miss Mustard Seed's Milk Paint in Australia. This blog post may contain affiliate links.


33 Comments
Cynthia
October 23, 2016 at 2:11 amEverything looks beautiful! Quite the transformation! For a suggestion, you might want to try removing the empty picture frames. It feels like their shape is competing with the shape of the mirror above the table. Also, consider staging the table top in an unbalanced way which would give it a more informal look. In these pictures, the arrangement is balanced with an equal number of items (groupings) on each side. Larger plants would add some height to the staging (it’s a big wall) or grouping them all together on one side in varying heights with other items placed across the table top. Love all the colors and individual pieces! Thanks for sharing!
IRestoreStuff
October 24, 2016 at 9:24 pmI love your ideas Cynthia! Need to get some larger plants or buy myself tall flowers in a vase weekly. 🙂
Gail
October 23, 2016 at 7:32 amThat’s a great improvement to the hall. Clever to think of it, Sharon.
Kristie
October 23, 2016 at 5:41 pmLovely blog you have by the way! I am also a fellow restorer and love milk paints. I have been overseas for a few months and arrived home yesterday. Discovering this post has been the inspiration I need to start on a new piece after months away from my paintbrush! Thank you!
Kristie
http://youtheworldwandering.com/
IRestoreStuff
October 24, 2016 at 9:24 pmGlad to be the inspirational boost for you Kristie! Happy painting …
Amaia
October 23, 2016 at 7:17 pmYou did a great job Sharon! It must have taken you hours!! I love it much more the way it looks now, it is much more welcoming, cozy and stylish
IRestoreStuff
October 24, 2016 at 9:25 pmThanks Amaia. It was quicker than I thought it would be and quite relaxing. My hand only started aching towards the end. 😉
Peg
October 24, 2016 at 10:48 pmLove the painted brick! The only thing I might consider doing is dropping the mirror by 2 rows of brick. That way some of your pretties would be reflected in it. Otherwise, great job!
IRestoreStuff
October 25, 2016 at 5:12 pmGreat thought Peg. I was using a hook that was already embedded in the brick wall, so making another whole was a little out of my train of thought. 😉
Kris
October 25, 2016 at 7:44 amI think the white picture frame needs to be bigger, and like the larger brown one further down, also to even on both sides like Cynthia said above, unbalance it more…? Couple questions, after your second coat of paint it looks like you hit more of the mortar than after your first coat….and I like that look, but you did or didn’t intentionally swipe paint onto the mortar? Just what ever happened to get swiped on it? And, I think painting your door, just like the one in your before shot….with that big beautiful flower on it would be gorgeous on the real door. Great job.
IRestoreStuff
October 25, 2016 at 5:14 pmThanks Kris. I love that little chippy white frame which is original paint and chipping perfectly, but you’re right I could use a bigger one.
Yes, I intentionally hit a little more of the mortar in random places, but not everywhere.
Lorrie
October 26, 2016 at 7:38 amThe painted brick looks so much nicer but I feel the gold mirror frame is hung way too high. It should be below the frame of the door. Place something larger like a topiary plant and other collectibles in an odd number on the table and that’s it! sweet!
IRestoreStuff
October 26, 2016 at 7:46 amThanks for your ideas Lorrie. The mirror is a little high isn’t it. I was using existing hooks that were in the brick wall. Might have to look at placing a lower one.
Jayne Whittles
October 28, 2016 at 5:56 amWhat a difference and it totally lightens up the space. I love that its a matte finish, looks just beautiful!
IRestoreStuff
October 28, 2016 at 10:03 amThanks Jayne.
Lisa House
November 30, 2016 at 12:19 pmI love the two tone look to the brick wall. As for your staging, I am no expert, but I think you need slightly larger/taller items, the mirror on the wall…I would tone down the frame color but add some metallics to items on the table. Again, just my opinion.
I LOVE the door with the big flower on it!
IRestoreStuff
November 30, 2016 at 1:53 pmThanks for your tips Lisa. Great thinking! Yes, the door was painted by a friend and you can see the time lapse video of her painting it on my blog or youtube channel.
TRacy floer
January 11, 2017 at 9:40 pmI would change up the mirror with a larger more rustic one with all the other cool stuff you have going one.love the brick!!and groups of odd # looks best , but just my opinion
IRestoreStuff
January 12, 2017 at 2:00 amThanks Tracy. Good idea.
Kathleen
January 12, 2017 at 12:28 amI absolutely love the painted brick and the chippy table! I would although get rid of some of the competition on that table. The brick has so much texture and pattern that the small items on the table look too busy. I would hang the mirror sideways and maybe crackle it so just a little gold shows through. Maybe a lamp or tall candle sticks, books tied with jute….maybe a little lavendar sprigs on top. I wish I had your brick wall though!
IRestoreStuff
January 12, 2017 at 2:00 amGreat ideas Kathleen! Thanks.
Jo
January 12, 2017 at 2:46 amHi – The space looks great! Unless you are all very tall, I’d try lowering the mirror so the space between it and the table isn’t so large. Also, someone had a good idea of offsetting the tabletop displays. Maybe one larger piece and 2 smaller.
Or two taller lamps or candlesticks on either side of the mirror and a flat basket in the center to hold some of your favorite smaller things. Have fun, most of all!
IRestoreStuff
January 12, 2017 at 3:01 amYes, agree with the mirror height. I was using an existing hook that was already in the brick wall.
Eleanor Hinson
January 12, 2017 at 2:52 amI love the painted brick. I have a fireplace I am going to work on. You also need a little color on your staging. Lower mirror, have a big colored vase on one or both sides with flowers, sticks, grasses, or other dried good s that enhances the look. Clear vase at Christmas with peppermint or other candies. Love, love the table. It looks amazing on the wall just add a color underneath it with a color of basket s. I love some towels to towel off dogs adults and umbrellas. The other container is for used towels. Also an old container for umbrellas on the wall would look beautiful and convenient.
IRestoreStuff
January 12, 2017 at 3:01 amLove these ideas. Especially the towel baskets for rainy weather!
Nancy
January 12, 2017 at 5:56 amYou are a very talented painter. I have admired many of your projects. The painted brick looks very nice. Its just my opinion but the white chippy table detracts from the brick wall. Maybe a table with a bit of contrast?
Karen Heath
January 12, 2017 at 2:44 pmSo I didn’t take the time to read all of the other suggestions but here are a couple from me… The mirror is too high, leaving you with a large space to fill. If you leave it that high you need to add a couple of much larger items to bridge the gap between the tabletop and the mirror. I even think you should experiment with the blue suitcase from the before pic being on top of the table
A lamp would be good for the table. Also consider using something UNDER the table, such as a stack of suitcases or a large basket. I recommend that you practice staging by trying to copy nice vignettes that you see on Pinterest or blogs that you read. Emily Henderson has several posts on her blog that give professional advise on staging various spots in you home, I.e. bedside tables, shelves, and sideboards. Good luck!
Diana
January 12, 2017 at 4:08 pmHonestly prefer the flower painted door (did you do?) with stack of dark suitcases but ditch the top decorations – just use that lovely mirror. The other side of the room is perfect using the washstand – don’t change a thing. The whole room is brightened and improved with milk paint on the bricks. I didn’t care for paint on table – looks just chipped rather than antique worn. Do you use dark wax to pick out furniture accents after the milk paint?
Inetia
January 12, 2017 at 9:15 pmSeeing the after picture was quite surprising; the huge difference it made. No less that amazing. Do you think that paint would stand up on a rock fireplace? The rocks get pretty warm after an evening of burning. Not hot enough to burn if you touch it but warm enough to give off ambient heat for quite a while after the fire is out.
Kim
April 6, 2017 at 6:23 amCan you use milk paint around a fireplace or is it too flammable?
IRestoreStuff
April 6, 2017 at 10:55 amI haven’t personally used it on a fireplace, but there are several blog posts online where people have used Milk Paint successfully on fireplaces. Once the paint is dry, I’d say it is fine. It also soaks into the brick work, becoming a part of the brick surface, so adheres quite well and very durable.
dana
June 9, 2017 at 1:58 amYou don’t have to undertake the daunting task of lowering and adding another hanger on the wall. You can buy a longer mirror or you can use the existing hanger to hand a chain or braided cord and attach your mirror lower to the chain or cord. Just a thought, because I HATE adding more hangers on a wall. You could literally forget about plants on the table and merely place a large “corn plant” or topiary on the floor. Since the gold frame is the only gold in the room, try a bit of the mustard paint in black or gray and antique the frame. NOT TO SAY THERE’S ANYTHING WRONG. I could never be half as brave as you are.
Patricia H Jude
June 9, 2017 at 4:33 amIt is a beautiful transformation!! I love the painted brick & setting. I would paint the front door to complement the rustic milk paint &, similarily, either change the mirror to a more rustic style or paint its frame to coordinate with the new look. This will make the area feel complete.